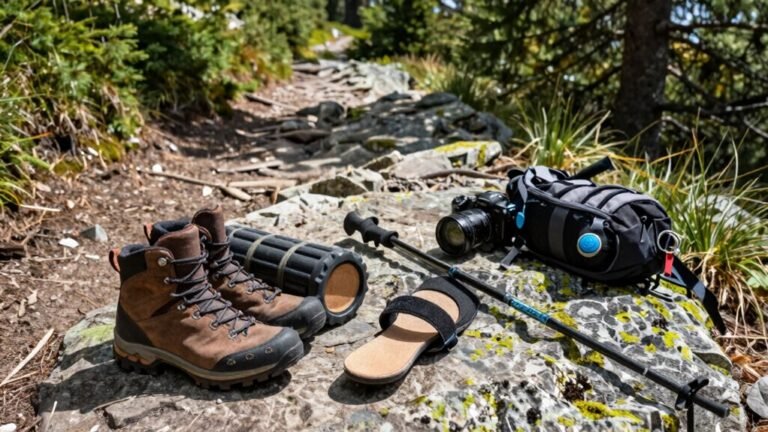
How to Use Hiking Shoes the Right Way
Pick the right hiking shoes for your trail—lightweight for paved paths, sturdy for rocky climbs. The right hiking shoes make all the difference in comfort and safety, so choose based on terrain and support needs.
Break in your hiking shoes around the house before hitting the trail. This helps prevent blisters and ensures a better fit when you’re on uneven ground.
Wear moisture-wicking socks and get the fit snug but comfortable, with no heel slippage. Use smart lacing techniques to lock in your heel and improve overall foot support.
Tackle slopes with confidence and maintain balance on slick roots or loose gravel. Proper technique and secure footwear help you stay stable in tricky conditions.
Always clean your hiking shoes and let them air out after each use. Remove dirt and debris to protect the materials and extend their life.
Store your hiking shoes in a cool, dry place away from direct heat. Proper storage keeps them in shape and ready for your next adventure.
There are a few sneaky tricks to make your hiking shoes last even longer—rotate pairs when possible and avoid harsh chemicals when cleaning. Small habits can significantly boost durability and performance.
Choose the Right Type of Hiking Shoe for Your Terrain
Ever wonder why your feet feel like they’re on a nature hike while you’re still figuring out the trail?
That’s because picking the right shoe for your terrain makes *all* the difference.
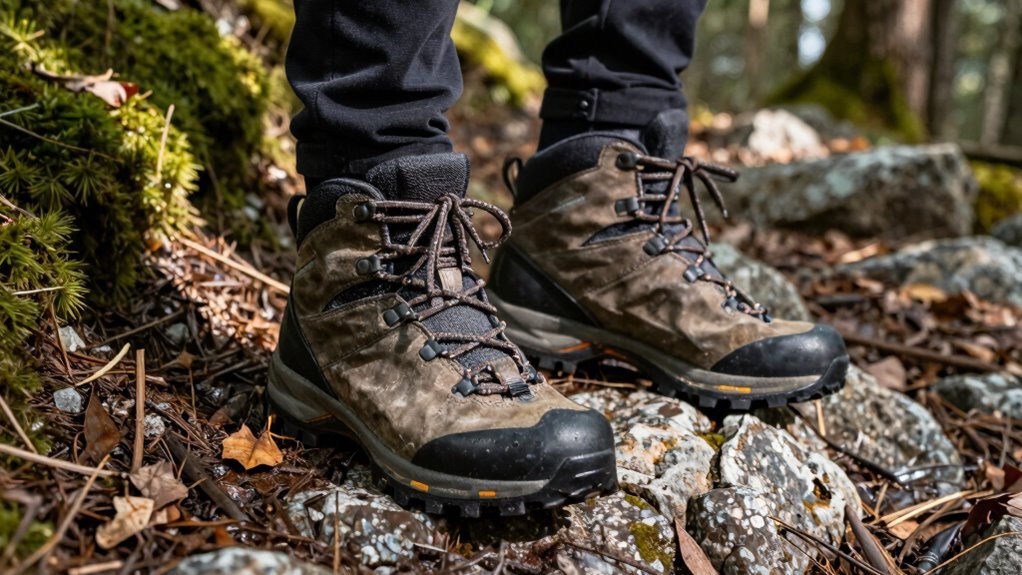
Hitting flat, paved paths? Grab lightweight trail runners or low-cut boots—they’re comfy, breathable, and perfect for easy going.
But when rocky ground or roots show up, you’ll want stiffer soles and ankle support to stay steady.
Muddy trails? Go waterproof with deep lugs and gusseted tongues to keep gunk out.
On rugged, steep climbs, high-cut boots with tough leather and aggressive tread grip like a boss.
You wouldn’t wear flip-flops to a snowball fight, right?
Mid-cut boots offer a balance of support and comfort for varied terrain.
Break in Your Hiking Shoes Before Hitting the Trail
While your new hiking shoes might look ready to conquer the wild, your feet will thank you if you let them ease into adventure first.
Breaking them in isn’t just smart—it’s blister prevention 101.
Think of it like training for a tiny foot marathon, minus the sweatbands.
- Wear your boots around the house to start, tackling chores or stairs like a pro.
- Gradually stretch tight spots with bundled socks or a hairdryer (careful not to cook them!).
- Use a boot stretcher or visit a cobbler for stubborn snugness.
- Hit easy trails first—short hikes with light packs help you monitor trouble zones.
- Fine-tune lacing and watch for hot spots before they throw a full-blown blister tantrum.
- Wear moisture-wicking socks to keep your feet dry and reduce friction during the break-in process.
Your shoes will mold to your feet, not the other way around—so take it slow and let the magic happen.
Wear Moisture-Wicking, Trail-Appropriate Socks
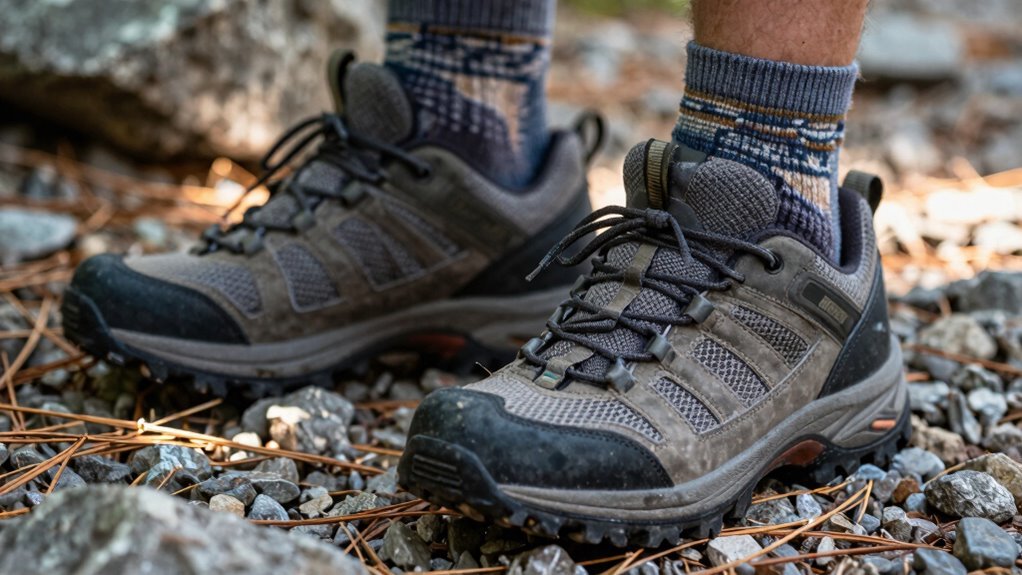
Stepping into the right socks is like giving your feet a high-five that lasts all hike long.
Ditch the cotton—they’ll trap sweat and turn your boots into swamps.
Instead, grab moisture-wicking socks made from merino wool, bamboo, or synthetics that pull sweat away fast.
These materials keep your feet dry, cut friction, and slash blister risk, even on rocky scrambles or muddy ascents.
Merino handles moisture like a champ, absorbing it without feeling wet, while bamboo zips sweat away quicker than most.
Plus, you’ll stay warm when it’s cold and cool when the sun blazes—no clammy toes!
Mesh zones add airflow where you sweat most.
And seriously, your hiking partners will thank you; dry feet mean way less funk.
These socks fight odor, resist bacteria, and bounce back after miles.
Moisture-wicking socks are made from synthetic fibers or treated natural fibers that enhance durability and performance on the trail.
Trust us, your feet won’t want to go adventuring any other way.
Ensure a Proper Fit for Comfort and Safety
When you’re about to hit the trail, nailing the fit of your hiking shoes can make all the difference between a happy hike and a painful slog.
Don’t let your boots betray you halfway up the mountain—start with a fit that’s snug, not suffocating.
Here’s how:
- Measure both feet yearly; they grow and change, especially in the evening when swollen.
- Leave a thumb’s width between your longest toe and the shoe’s end—wiggle room prevents black toes!
- Keep your heel locked down with no lift—ask a friend to peek while you bend (self-checks lie).
- Snug across the midfoot but never pinching—your foot and the shoe should be besties, not enemies.
- Stand on the insole to test length, and pick wide or narrow models if your feet shout for freedom.
A well-fitted shoe hugs every curve, flexes at the right spot, and turns “ouch” into “awesome!”
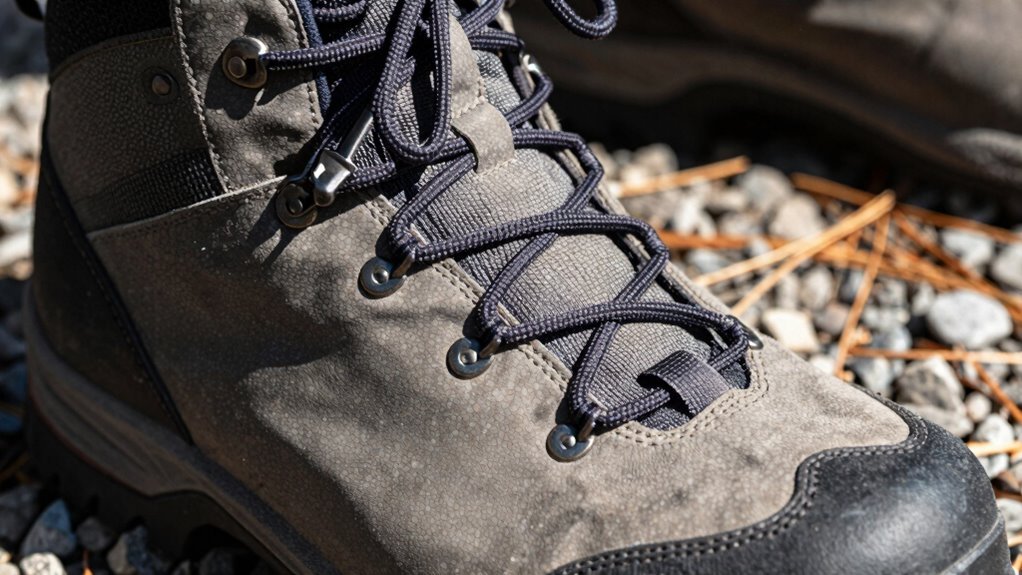
Lace Your Hiking Shoes Correctly for Support
How’s your heel holding up on those downhill stretches—floating like a lost balloon or snug as a bug in a well-laced boot?
If it’s slipping, you’re missing out on the magic of the heel lock.
Lace normally until the top two eyelets, then loop each end and pull the opposite lace through—tighten for a secure ankle hug.
Double-wrap for extra tension if the trail gets gnarly.
For even pressure, stick with criss-cross lacing—it’s simple, reliable, and great for most feet.
Feel a hotspot on your midfoot? Try window lacing: skip the crisscross where it hurts and go vertical to create a pressure-free zone.
It’s like giving your foot a mini vacation.
Lace smart, hike happy—your boots will feel like they were made just for you.
Adjust Your Footing on Uphills and Downhills
Now that your laces are locked in tight and your heels are behaving, let’s talk about how you’re actually stepping on the trail—because plowing straight up a hill like a determined goat might feel heroic,
but it’s not always the smartest move.
- Take shorter, quicker steps uphill (170–180 per minute) to save your knees and keep momentum
- Step side-to-side at 45 degrees or zigzag to cheat that steep grade and give your calves a break
- Lean from the ankles, not the waist, and keep your nose over your toes to stay balanced
- On downhills, land softly with bent knees, stay centered over your feet, no leaning back like you’re dodging drama
- Use crossover steps or side-stepping on loose rock to plant your shoes flat and stay in control
Smart footing beats brute force every time—your legs (and hiking shoes) will thank you!
Maintain Traction on Slippery or Uneven Surfaces

Even if the trail throws mud, ice, or slick rocks your way, your hiking shoes can still keep you steady—with the right grip and a little know-how.
You’ve got deep 4 mm lugs grabbing mud and sharp treads biting into scree, so trust your soles. High-quality rubber hugs wet rocks like it means business, while that chunky heel brake slows you down steep, slippery slopes with ease.
On icy ground, toss on Yaktrax with their springy steel coils—suddenly you’re a mountain goat with confidence.
Screw in some steel bits or dab on seam grip if your soles are getting slick—DIY magic! And hey, a quick sandpaper scrub wakes up tired treads.
Use the heel-plant on loose downhill, or step-kick through squishy mud like you’re in a swampy dance-off.
With grippy outsoles and smart moves, you’ll stay upright, steady, and smiling—even when Mother Nature tries to prank you.
Clean and Dry Your Hiking Shoes After Each Use
Once you’re back from the trail, don’t just toss your hiking shoes in the corner like they’ve retired—give them a little love so they’ll keep carrying you through muck, rock, and every adventure in between.
- Knock off dried mud with a brush or butter knife so grit doesn’t wreck the fabric
- Rinse lightly, then scrub with a soft brush and warm water—skip the harsh detergents
- Pull out the insoles and laces to clean inside and let air flow where feet go
- Use a specialized cleaner like Nikwax or Shoe MGK to gently lift grime and prep for waterproofing
- Stuff with newspaper and air-dry away from direct heat—you’re not cooking them, just cozying them up
Clean shoes aren’t just fresh—they’re tough, ready for next time, and way less likely to stink up your car.
Treat them right, and they’ll never bail on you mid-hike.
Store Your Hiking Shoes to Preserve Performance
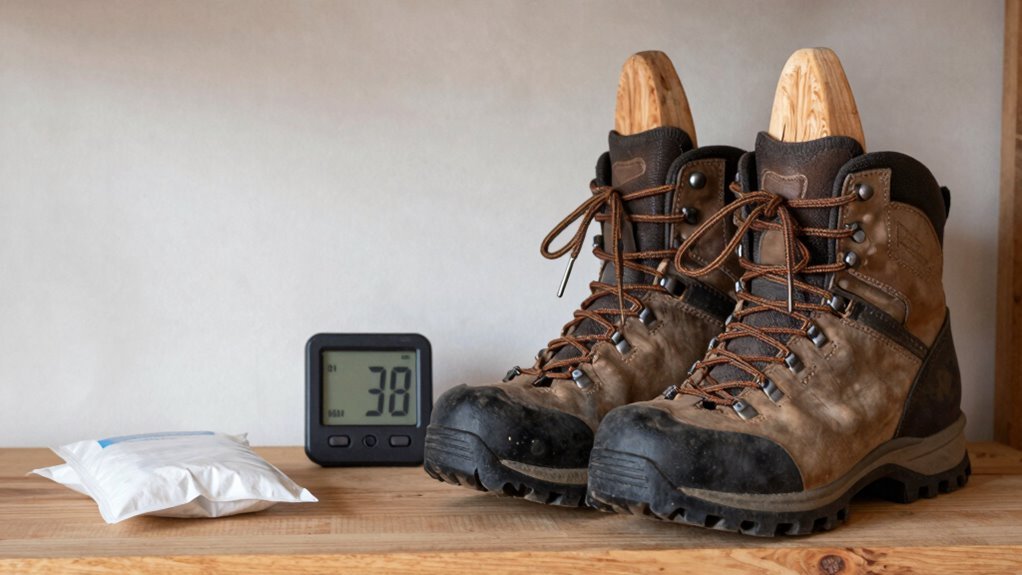
Giving your hiking shoes the right home after their adventure keeps them happy, healthy, and ready to hit the trail at a moment’s notice.
Store them in a cool, dry spot—never the damp garage or sunbaked car—where humidity stays under 60%.
Skip plastic bags or sealed bins unless your shoes are bone-dry and you’ve tossed in silica gel, or you might grow mold instead of memories.
Let them breathe: use fabric bags, open shelves, or shoe racks so air can move freely.
Stuff them lightly with newspaper or shoe trees to hold their shape and wick away lingering moisture—think of it as a pillow for your soles.
Keep leather pair conditioned and always store them uncompressed.
Check in every few weeks; nobody wants a surprise mildew party.
Rotate pairs if you can, because even shoes deserve a break.
Your future hikes will thank you—happy feet make for epic trails!
Frequently Asked Questions
Can I Wear Hiking Shoes in the Snow?
Yes, you can wear hiking shoes in the snow—just make sure they’re built for it. Look for waterproof membranes like GORE-TEX and insulation like COLD.RDY to stay dry and warm. Shoes with grippy Continental rubber soles handle snow like a champ, and deeper lugs keep you steady. Just don’t trust any sole on slick ice—toss on microspikes for safety. Your feet will thank you—and so will your sense of adventure!
How Long Do Hiking Shoes Typically Last?
You can expect your hiking shoes to last anywhere from 400 to 1,000 miles, depending on the type and how rugged the trails are.
Lightweight trail runners usually tap out around 500 miles, while sturdier backpacking boots can go the distance—sometimes up to 1,500 miles!
You’ll know it’s time for a swap when the soles look like crumpled potato chips and your feet start feeling every rock.
Are Hiking Shoes Waterproof by Default?
Nope, hiking shoes aren’t waterproof by default—don’t let that “outdoor” vibe fool you!
Most rely on basic water resistance, not full protection.
You’ve gotta check the label; real waterproofing needs special membranes like Gore-Tex.
Think of it like rain jackets: not all block storms, even if they claim to “handle weather.”
Skip the soggy socks—know what you’re lacing up!
Can I Use Hiking Shoes for Running?
Yeah, you can run in hiking shoes, but you’ll feel the heaviness fast—kind of like sprinting in socks filled with sand.
They’re built for crunching through mud, not hitting splits.
The stiff soles support rocky trails, not your morning jog.
For short bursts or light trails, they’ll work, but your feet will thank you later if you stick to trail runners for speed.
Save the hiking kicks for when the path gets wild and woolly!
Should I Size up for Hiking Shoes?
You should size up for hiking shoes only if your feet are between sizes or swell a lot—otherwise, skip it. Think of Sarah, hiking the Rockies in brand-new shoes one size too big; by mile three, her heels slipped, and blisters formed.
Snug heels, wiggle room for toes, and a fit that hugs your foot like a handshake, not a straitjacket—that’s the sweet spot. Keep ‘em tight enough to stay surefooted, but loose enough to love the trail.
Conclusion
You wouldn’t wear flip-flops to a snowball fight, right? Same with hiking—your shoes are your trusty sidekicks. Once, a buddy ignored breaking in his boots and hiked the Rockies; he ended up with blisters big enough to map. Ouch! But now you know better. Lace up smart, sock right, and treat your shoes well—they’ll carry you farther than you ever dreamed, one happy, muddy step at a time. Adventure awaits!
References
- https://www.camperlists.com/pt/blogs/news/how-to-choose-the-best-hiking-boots-for-different-terrain
- https://www.rei.com/learn/expert-advice/hiking-boots.html
- https://obozfootwear.com/en-us/community/hiking-footwear-styles-explained-choosing-the-best
- https://www.alpenglowgear.com/blogs/adventureawaits/choosing-footwear-for-different-terrain-types/
- https://www.outdoorgearlab.com/topics/shoes-and-boots/best-hiking-shoes
- https://www.youtube.com/watch?v=D8oMRJQdOKE
- https://www.wrightsock.com/blogs/news/5-ways-to-break-in-new-hiking-boots
- https://www.kuhl.com/borninthemountains/how-to-break-in-hiking-boots-the-ultimate-guide
- https://www.columbia.com/breaking-in-hiking-boots.html
- https://stories.hanwag.com/en/how-to-break-in-hiking-boots-read-the-expert-guide/