Quick Tips for Pack Fit

Get the perfect pack fit by measuring your torso—yes, that bump at the base of your neck counts—and match it to your pack’s size. A proper pack fit starts with accurate measurements to ensure comfort and balance on the trail.
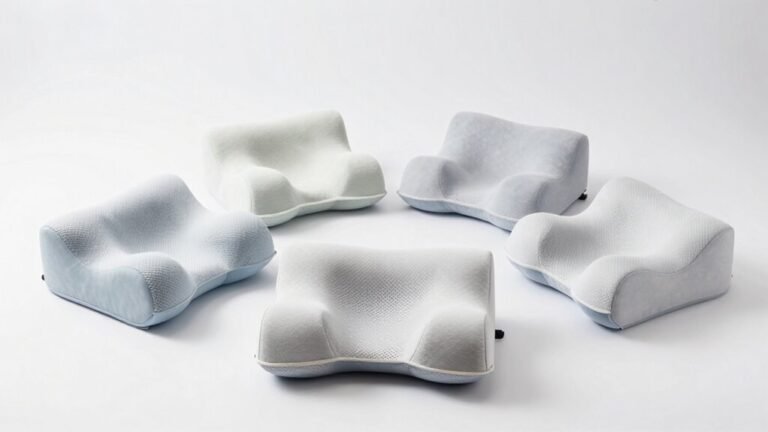
Load your pack and position the hip belt snugly over your hip bones, where it will support weight without pinching. This is key to achieving a stable pack fit that reduces strain on your shoulders.
Anchor the shoulder straps between your shoulder blades and use load lifters to angle the pack inward for a secure, close-to-body feel. The pack should feel like it’s hugging you, not pulling you down.
Position the sternum strap just above your pectoral muscles to stabilize shoulder movement. Adjust it comfortably—tight enough to hold, but not restrict your breathing.
Tighten, tweak, and walk around as if you’re on a real hike. If the pack bounces or shifts, fine-tune the straps until everything feels balanced and secure.
With a balanced load and a well-fitted pack, you’re set for a happy hike and a big adventure. You’re gonna love what comes next.
Understand the Importance of Proper Pack Fit
Ever wonder why your backpack feels like it’s staging a rebellion halfway up the trail? That’s your body protesting a poor fit.
If your pack rides high, sags low, or wobbles like jelly, it’s not just annoying—it’s risky.
Heavy loads over 20% of your weight can strain muscles, zap energy, and even sideline you with knee or ankle pain.
Proper pack fit isn’t about comfort alone; it’s about staying safe and strong mile after mile.
A well-fitted pack hugs your torso, transfers most weight to your hips, and moves with you, not against you.
You’ll walk farther, breathe easier, and actually enjoy the view instead of cursing every switchback.
Skip the guesswork—measure your torso, size it right, and feel the difference.
When your pack behaves, adventure gets way more fun.
Research shows hikers carrying loads exceeding 20% of body weight are more likely to experience injuries and lower completion rates.
Adjust Shoulder Straps for Comfort and Stability
How does it feel when your backpack finally stops fighting you every step of the way?
You’ve got this! Start with all straps loose—shoulder, hip, sternum, and load lifters—so your pack settles right.
Slide it on with your actual gear inside, then tweak from there.
Anchor the shoulder straps between your shoulder blades, not too high or low, so they hug you snug but don’t pinch.
Tighten them just enough to feel the weight balanced across your back, then lean forward to let gravity dial it in.
- Hook the sternum strap across your chest to stop slippage
- Angle load lifters to pull the pack close at 30°–45°
- Keep tension even—no sagging or one-shoulder tug-of-war
- Adjust on the go: tighter for rocky scrambles, looser uphill strolls
Proper strap alignment ensures better weight distribution, especially when the stabilizer straps are set at the ideal 30° to 45° angle.
Now that’s a happy hike!
Position the Hip Belt Over Your Hips Correctly
Slide that hip belt right into place and feel the difference—when it’s positioned just right, your pack stops riding up like a nervous squirrel and actually stays put.
Center the padded middle of the belt right over your iliac crest, that bony edge at the top of your hips, so it hugs snug without pinching.
The contoured padding should cup your hips like a cozy handshake, with the top of the belt sitting 1–2 inches above the crest.
Make sure the padded wings fully cover your front hip bones and wrap slightly beyond them, extending about an inch toward your belly button.
In back, the upper padding covers the top of your rear hip bones.
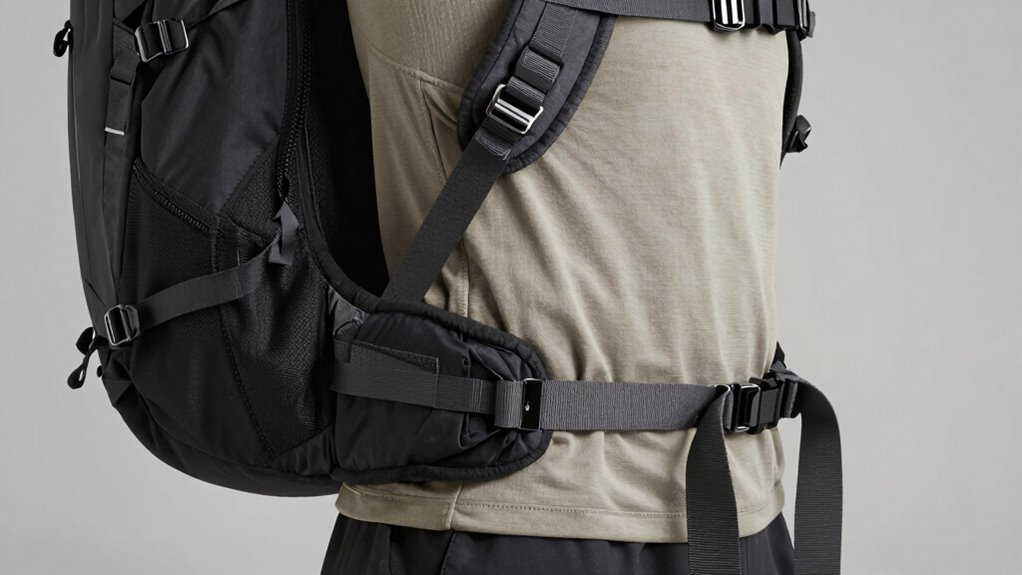
Buckle up with the clip centered over your belly, snug but not too tight—leave room to breathe and adjust.
Check for gaps, wobble, or pressure points, and tweak until it feels solid, stable, and smooth.
A proper hip belt fit ensures weight is transferred to your hips, not your shoulders, especially when the torso length is correctly measured and matched to your frame.
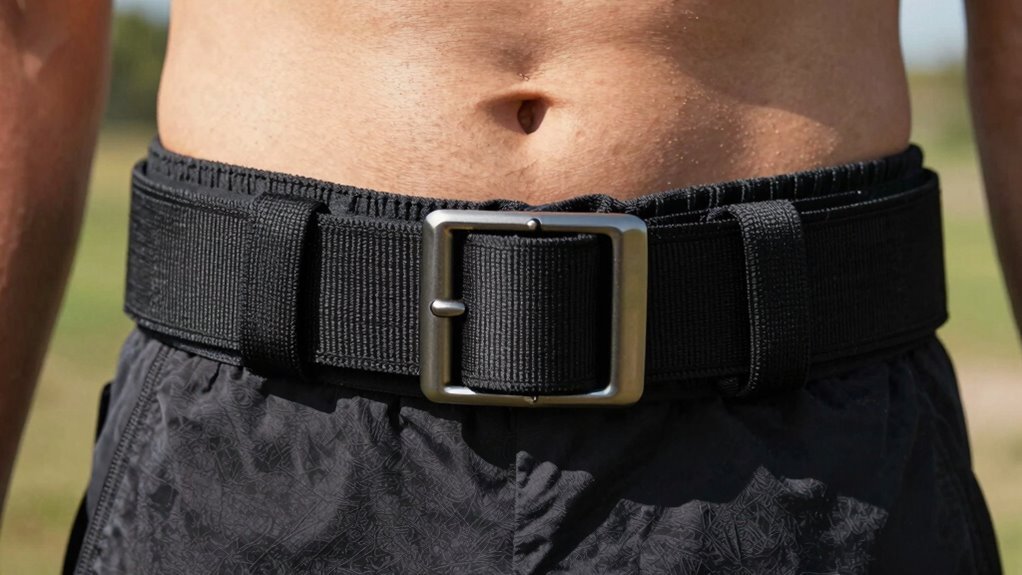
Tighten Load-Lifter Straps to Balance Weight
Now that your hip belt is snugly hugging your hips just right, it’s time to get serious about where the real magic happens—those handy load-lifter straps up top.
These little wonders pull the pack’s weight off your shoulders and into your hips, keeping everything stable and comfy.
Don’t yank them like you’re pulling weeds—ease into it!
- Angle them at 30–45 degrees from the pack to your shoulders—like a cozy roof over your back
- Snug but not stiff, so you’re not wrestling your pack into submission
- Watch for pinching under the arms—your armpits aren’t sandwich presses
- Let the frame hug your spine, stopping when the weight shifts and your shoulders sigh in relief
Done right, your pack’ll feel like it’s floating.
Seriously, it’s like backpack yoga—calm, balanced, and oh-so-right.
Use the Sternum Strap to Reduce Shoulder Fatigue
Snap that sternum strap on and give it a gentle tug—like a zipper on your happiness jacket for your shoulders.
You’re not just holding straps in place; you’re shifting the load where it belongs: onto your strong chest muscles, not your tired shoulders.
It pulls the pack close to your center, so it moves *with* you, not against you, cutting fatigue fast.
No more straps slipping off or digging into your deltoids—especially if you’ve got broad shoulders or slick fabric on your shirt.
Keep it snug but chill; over-tightening kills the vibe and your breath.
Position it just above your pecs, let the elastic stretch with you, and boom—better balance, less ache, all day.
It’s like a seatbelt for comfort, keeping everything steady on bumpy trails.
Seriously, skip it and you’re hiking the hard way.
Check and Adjust the Torso Length
You’ve locked in that sternum strap and already feel your pack playing nicer with your shoulders. So let’s keep building that sweet-fit momentum—because a comfy harness isn’t magic, it’s math.
– Measure your torso: Tilt your head down, find that bony bump at your neck (C7).
Then run a tape down to the top of your hip bones—yep, the spot where your thumbs naturally rest.
– Pick the right size: Got 18–19 inches? That’s medium.
If you’re between sizes, size down—hips love carrying weight, shoulders don’t.
– Dial it in: With the pack on, snug the hipbelt right on your iliac crest.
And check if the yolk sits just below your neck bone.
– Test it loaded: Throw in about 15 pounds and walk around—no hiking required (yet).
If it feels like a backpack hug? You nailed it.
Distribute Weight Strategically Within the Pack
Slide your sleeping bag into the bottom of the pack like it’s crawling into bed—because this is where your fluffiest, lightest gear belongs.
Toss in mid-weight stuff like your sleeping pad and puffy clothes; they compress easily and help fill the base.
Now, gear up: slide heavy items—food, stove, tent, water reservoir—into the middle zone, snug against your back.
This keeps the center of gravity close, so you won’t wobble like a shopping cart with one wheel.
Aim for 60–70% of the weight between your shoulder blades—it’s your pack’s power zone.
Top it off with easy-reach items (think snacks or a sweater), but skip heavy stuff up top, or you’ll lean backward like a tipping penguin.
Light clothes and odds and ends go in front, hugging the core.
Side pockets? Perfect for water and rain gear—just balance both sides.
Tighten load-lifters to pull weight forward and dance through the trail with ease.
Secure Loose Items to Prevent Shifting
Most of the time, a wobbly pack doesn’t mean your back’s weak—it means your stuff’s staging a rebellion from inside.
Keep your gear in line by securing loose items so they won’t bounce around like unruly roommates.
A little prep goes a long way in keeping your pack stable and your mind at ease on the move.
- Use packing cubes to bundle clothes and small items, so they don’t slide with every step.
- Clip essentials like wallets or keys to internal straps—no more digging like treasure hunting.
- Lock zippers with twist ties, carabiners, or small locks to stop sneaky gaps or spills.
- Bundle loosely with mesh bags or compression sacks to shrink empty space and pack tighter.
Everything stays put, your balance stays solid, and your pack behaves—no mutiny allowed!
Test Fit Before Hitting the Trail
Grab your pack and load it up like you’re about to hit the trail—because now’s the perfect time to fine-tune the fit.
Start by measuring your torso from the bump at the base of your neck to the top of your hips; that’s the magic number for sizing.
Match it to the brand’s chart—when in doubt, size up!
Pack it with at least your base weight, using stuff sacks to keep things balanced, like you’re smuggling snacks for a squirrel.
Make sure the load feels centered, not tugging backward or listing like a tipsy hiker.
Adjust the shoulder harness so it hugs your back without choking you—safety first, comfort always.
Walk around, climb a slope, even do a little dance.
If it bounces or chafes, tweak it now, not miles in.
A quick shakedown hike saves you from grumpy trail meltdowns later.
Your back will thank you!
Make On-the-Go Adjustments as Needed
When the trail throws you a curveball, your pack shouldn’t be the one throwing your back out.
Keep tweaking it on the move—your body will thank you. A little strap fiddling goes a long way in comfort, balance, and staying happy on long hikes.
- Slide that hipbelt—keep it hugging your hips just right, half on, half off your hip bones, and snug it up without squishing.
- Play with shoulder straps—they’re not weightlifters; just keep them comfy and flat, letting your hips do the heavy lifting.
- Tweak the load lifters—pull ’em to tilt the pack close like a cozy backpack hug, not a faceplant push.
- Click and relax the sternum strap—snug but not tight, so you can breathe deep and still wave at squirrels.
Small fixes mean less ache and more “wow, this trail is awesome!”
Frequently Asked Questions
Can I Use My Pack if the Hip Belt Sits on My Pelvis?
No, you shouldn’t use your pack if the hip belt sits low on your pelvis—it’ll slide, strain your shoulders, and wreck your back.
Pop that belt right on your hip bones where it belongs!
Snug, centered, and high keeps the weight where it should be: on your hips, not your poor spine.
Trust me, your back’ll throw a party if you get it right—no more “why does everything hurt?” moments!
How Often Should I Replace Worn Pack Straps?
You should replace worn pack straps every 1–2 years if you’re hiking regularly—unless you enjoy playing “will it hold?” halfway up a trail!
Frayed stitching, constant slipping, or looking like your straps survived a bear attack?
Time to swap ’em.
Lucky for you, replacements are cheap, easy to install, and way less painful than a mid-hike breakdown.
Keep patching, stay proactive, and your pack’ll outlive your hiking boots—no drama!
Are Pack Covers Worth Using in Heavy Rain?
Yeah, pack covers are worth it in heavy rain, but don’t rely on them alone.
They’ll keep light sheets of water off, sure, but once you’re slogging through hours of downpour, water sneakily seeps in around the straps and back panel.
Think of them like umbrellas—helpful, but not waterproof bunker gear.
Pair that cover with dry bags inside, and you’ve got a one-two punch against soaked socks and sad, soggy books.
Smart move.
Do Frameless Packs Fit Differently Than Framed Ones?
Yeah, frameless packs fit differently than framed ones—you’ll feel the freedom right away.
No stiff frame means they move with you, not against you, while hugging your back like a backpack that’s had too much coffee.
They’re forgiving on fit, stretchy on sizing, and won’t complain if your torso’s a little weird.
Just don’t load ‘em like a pack mule—keep it light or your shoulders’ll throw a fit.
Should I Size My Pack Differently With a Winter Coat?
Yep, you should size your pack differently when wearing a winter coat—don’t get squeezed like a stuffed mitten!
Winter layers add bulk, so you’ll want extra room in the torso and shoulders.
Adjust the harness while wearing your coat to keep it snug but comfy.
Padded, adjustable straps are your best friends, letting you squeeze in all that cozy fluff without sacrificing support.
Rock that winter adventure in style!
Conclusion
You’ve dialed in your pack like a pro, and now it fits like a glove—snug, balanced, and ready for adventure. When everything’s in place, your pack feels less like a burden and more like a helpful buddy tagging along. Don’t forget to tweak straps on the move, because trails change, and so should you. Now, go crush those miles, laugh at the stumbles, and own every step with confidence!
References
- https://commons.erau.edu/edt/140/
- https://www.gregorypacks.co.za/how-to-ensure-your-hiking-backpack-fits-perfectly-expert-guide-for-south-african-adventurers/
- https://outdooradventuretraining.com/2025/05/04/packs-pounds-percentages/
- https://www.rei.com/learn/expert-advice/backpacking-weight.html
- https://bearfoottheory.com/hiking-daypack-fitting-guide/
- https://www.outdoors.org/resources/amc-outdoors/outdoor-resources/carry-in-comfort/
- https://material-civet.files.svdcdn.com/production/images/documents/Effects-of-Pack-Weight-on-Endurance-of-Long-distance-Hikers.pdf?dm=1620062851
- https://www.youtube.com/watch?v=uXRYPPhpBSE
- https://www.deuter.com/us-en/advice/how-to-adjust-a-backpack
- https://www.salomon.com/en-us/sg/a/how-to-properly-adjust-your-backpack