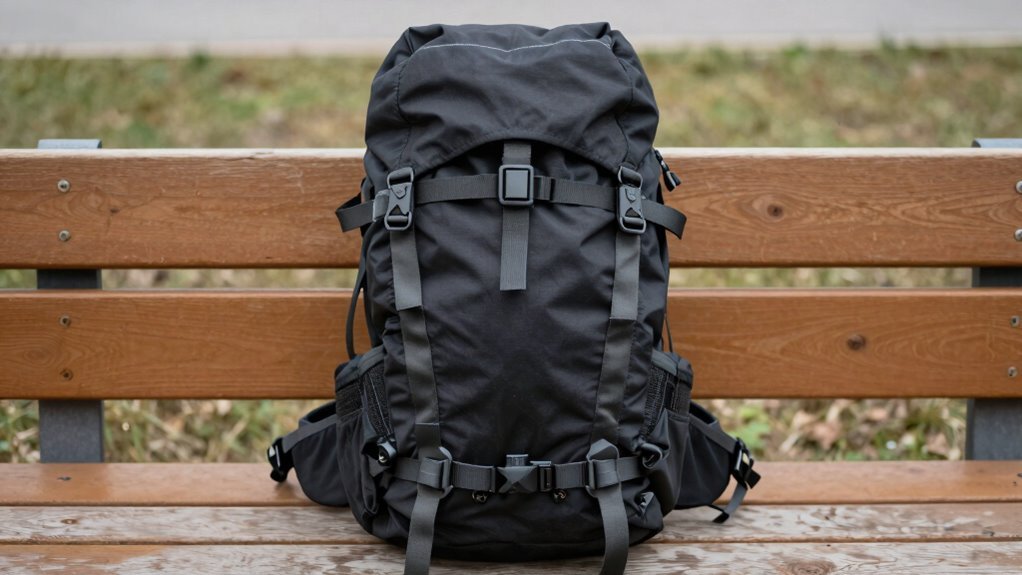
How to Fit a Backpacking Pack Correctly
To properly fit a backpacking pack, start by measuring your torso from the base of your neck to your hip bones—pack size is based on torso length, not your height. Getting this measurement right ensures the backpacking pack will sit correctly on your body.
Snug the hip belt securely over your hip bones, not your waist, so the majority of the weight rests on your hips. This allows the backpacking pack to ride comfortably and maintain stability on rough terrain.
Position the shoulder straps just below your collarbones and adjust the load lifters to pull the pack close to your back. This enhances control and reduces strain during long hikes.
Pack heavier items low and centered in the bag to maintain balance and improve weight distribution. Finish by clipping on the sternum strap to stabilize the shoulder straps.
Understand Your Torso Length and Pack Sizing
So, how do you avoid ending up with a backpack that rides up like a disobedient kangaroo? You start by measuring your torso—yes, really.
Tilt your head down and find that bump at the base of your neck (that’s C7), then locate the top of your hip bones.
Grab a flexible tape or string, follow your spine’s curve, and measure straight down from C7 to that hip line.
Enlist a friend or use a mirror to keep things accurate.
Do it a few times and average it—you want precision, not guesswork.
That number? It’s gold.
Match it to pack sizing: small (15–18”), medium (17–21”), large (19–24”).
Height doesn’t matter—torso length does.
If you’re stuck between sizes, go smaller to keep weight on your hips, not your shoulders.
Start measurement at C7 to ensure consistent and accurate torso length assessment.
And hey, brands vary, so check their charts.
Nailed the fit? Now you’re ready to roam, not wobble.
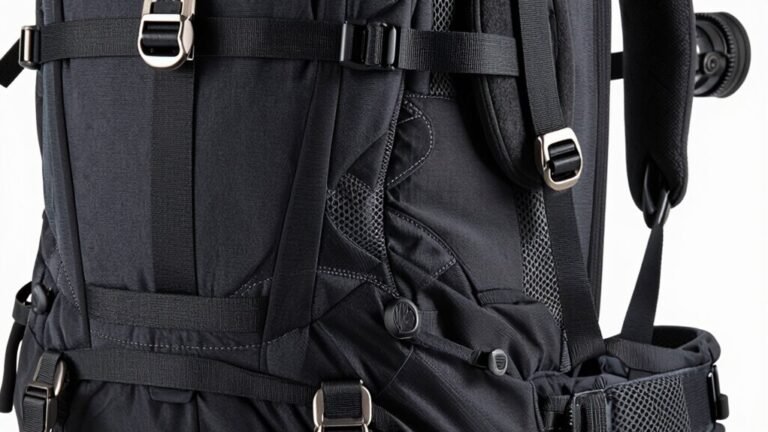
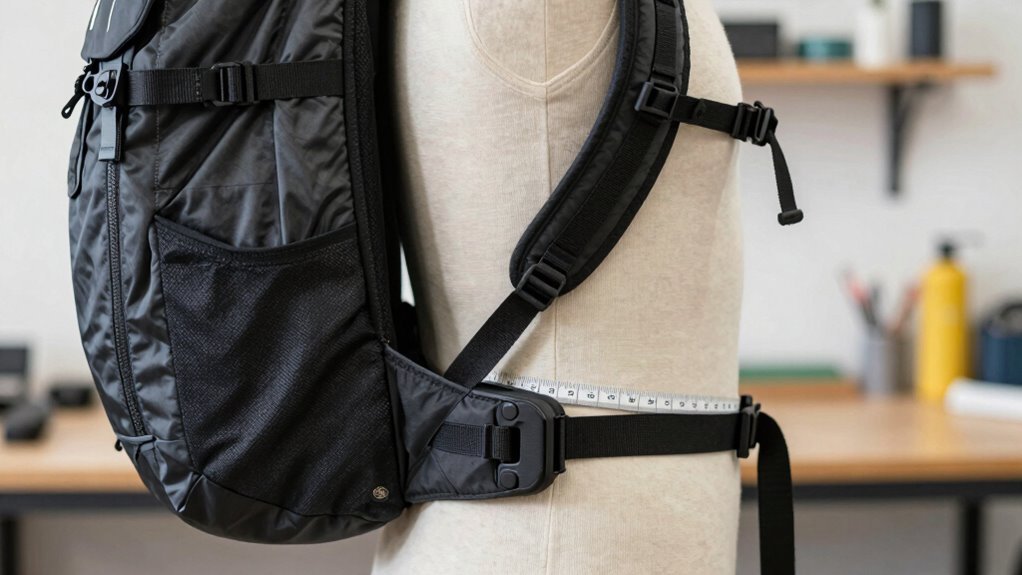
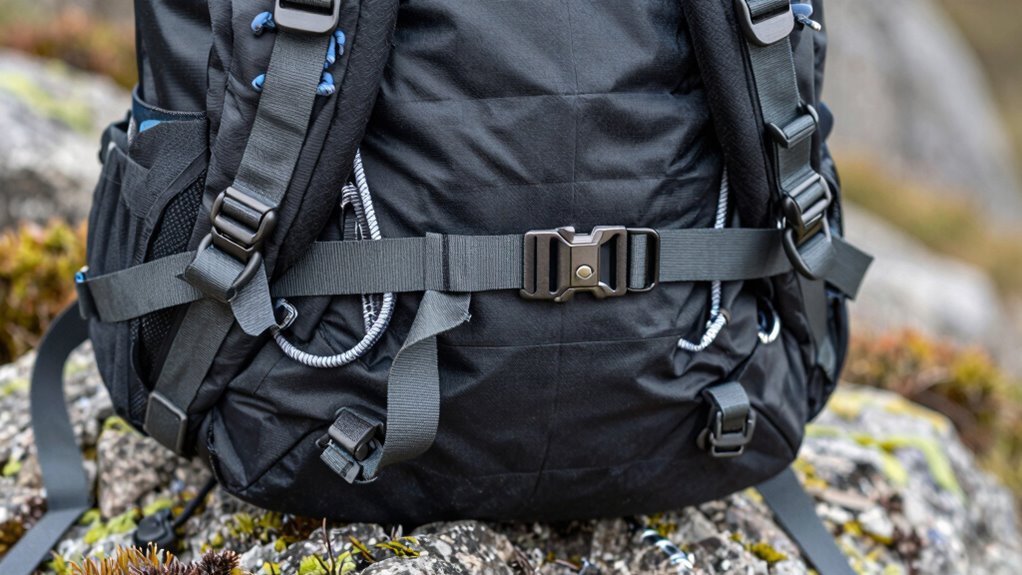
Adjust the Hip Belt for Maximum Support
Where should your hip belt actually sit—floating around your waist like a deflated innertube or pinching your hips like an overzealous vise? Neither!
It should hug the top of your hip bones (that bony ridge at your sides), centered perfectly on your iliac crest, about 2 inches below your belly button.
Loosen everything first, then put the pack on and fasten the buckle dead center over your stomach.
Tighten it snug—but not squirrel-level tight—so it stays put without squashing you.
Make sure the padded wings wrap around your hips, extending slightly past the front hip points, leaving an inch on each side of the buckle and a few inches between the tips.
Load it up with 10–20 lbs, wiggle a bit, and fine-tune.
When it’s right, the pack rides like it’s part of your body, not a rebellious suitcase trying to escape.
This positioning ensures the weight is carried on your iliac crest, where the hipbelt is designed to transfer load efficiently to your skeletal structure.
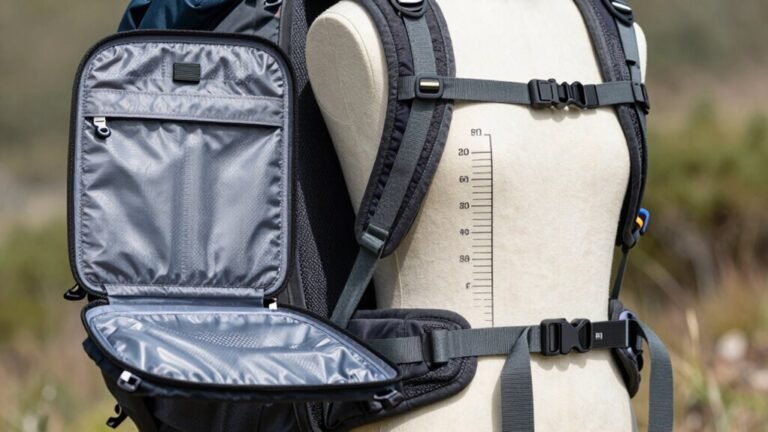
Position the Shoulder Straps Properly
Slide those shoulder straps on like you’re shrugging into your favorite hoodie—except this one’s got a job to do. Get them sitting just right so your pack rides comfortably mile after mile.
- Anchor the straps 1–2 inches below your shoulder tops, right at the peak of your shoulder blades—this keeps padding where it counts.
- Let the straps hug your shoulders smoothly, wrapping over and down without gaps or pinching (two fingers snug is perfect).
- Pull gently on the straps to tighten, but remember: the hipbelt’s the real MVP carrying most of the load.
- Check for centering, comfort, and no rubbing—especially if you’ve got narrower shoulders or need a women-specific fit.
Done right, your shoulders won’t hate you by mile ten. And hey, if they’re screaming? Time to size check—might be a fit mismatch!
For optimal alignment, position the yolk of the harness about an inch below the C7 vertebra, which you can locate by lowering your chin to chest, ensuring the back panel measurement matches your torso length.
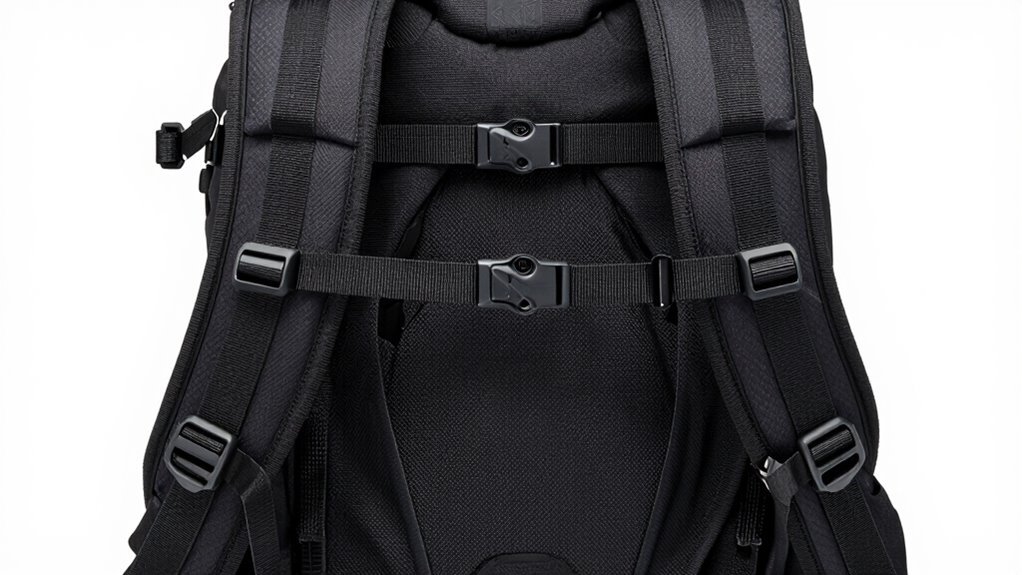
Fine-Tune the Load Lifters for Stability
Now it’s time to dial in those load lifters and really lock your pack into place—think of it as giving your backpack a quick hug back so it stays glued to your body, not flopping around like a loose sack of potatoes.
These straps run from the top of your shoulder straps up to the pack frame, and they’re key to keeping everything snug.
After tightening your hip belt and shoulders, pull the tabs at the ladder locks to shorten them.
Aim for a 45-degree angle where the straps meet your shoulders—it should slope downward slightly.
That lifts the harness off your shoulders and pulls the load closer to your spine.
You’ll feel more balanced, with less sway and no nagging shoulder drag.
Don’t crank them down too hard, though—leave room for two fingers under the straps.
A little tweak goes a long way in turning a wobbly load into a smooth, comfy carry.
Balance the Pack’s Weight Distribution
Loading your pack smart beats stuffing it willy-nilly every time—think of it like packing a suitcase for a road trip, except this one’s hitching a ride on your back for miles.
Balance is everything, and with a few clever moves, you’ll hike easier and smile wider.
Here’s how to nail it:
- Bottom zone: Stash your sleeping bag or extra clothes low—they’re light and won’t be needed until camp.
- Core zone: Load heavy gear like food and water close to your back, centered between your shoulders—this keeps your balance in check.
- Top zone: Toss frequently used items like a rain jacket or snacks up here for quick grabs.
- Balance & compress: Pack evenly side to side, then tighten those compression straps—no lopsided waddles or surprise lean-falls!
A well-balanced pack feels like it’s hugging you, not hauling drama.
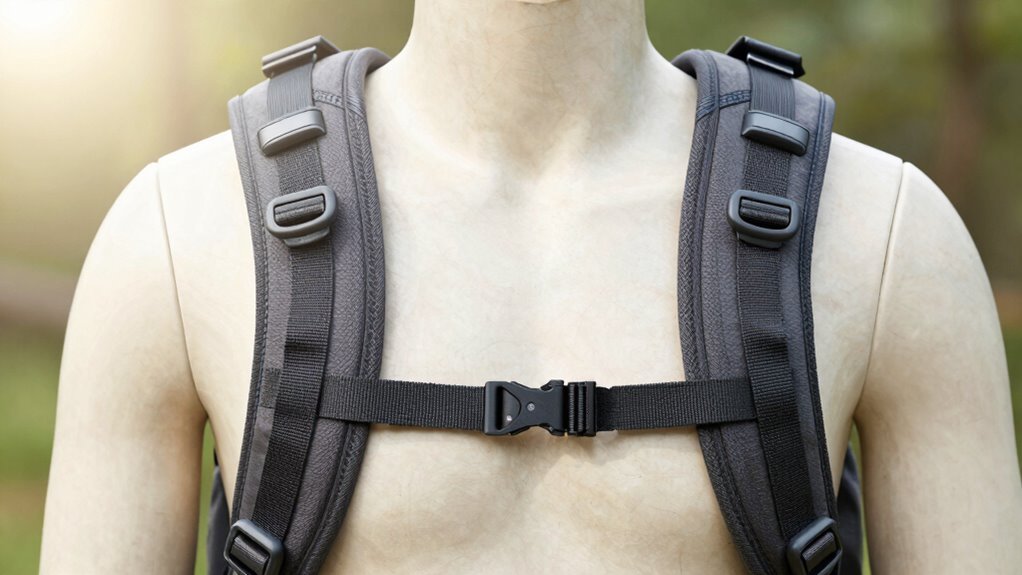
Use the Sternum Strap for Comfort and Alignment
You’ve packed it smart, balanced it right, and now that pack’s sitting snug—so let’s keep it there.
Snap on the sternum strap just below your collarbones, not too tight—think “snug bear hug,” not “suffocating boa constrictor.” It pulls your shoulders back, so you’re not slouching like a sleepy sloth, and stops the straps from slipping off.
It distributes weight evenly, making the pack feel lighter and saving your shoulders from protest. When you hike, scramble, or even trip over a root (oops), the strap keeps everything stable and close to your body.
You’ll move freely, breathe easy, and keep your posture in check, even with a heavy load. Properly adjusted, it’ll give you comfort mile after mile, without pinching or restricting. It’s the little thing that keeps your upper half happy—don’t hike without it!
Secure the Load Adjuster Straps for Load Control
Fine-tuning your pack’s balance starts with a quick tug on the load adjuster straps—those handy webbing bands near your shoulders.
These little heroes pull the top of your pack closer to your body, stopping it from wobbling like a wiggly jelly.
When you tighten them just right, you shift the weight forward and let your hips do the heavy lifting—because, let’s be honest, your shoulders didn’t sign up for a marathon.
To nail it every time, remember these four key points:
- Loosen straps before shouldering the pack, then tighten *after* fastening the hip belt.
- Aim for a 45-degree angle where the straps meet your shoulders—no skiing-slope angles!
- Don’t crank them down like you’re wrangling a wild animal; a snug pull is plenty.
- Only packs with a real frame respond well—load lifters on frameless packs are basically fashion accessories.
Test the Fit Before Hitting the Trail
Grab your backpack and some gear—your adventure starts with a proper fit check. Load it with about 15 pounds to mimic real conditions, like you’re sneaking snacks for the whole trail. Loosen all straps first—you’re not wrestling a dragon yet!
Slide the hip belt over your hip bones (not your waist, unless you want your pack hanging at your knees). Snug it down so most weight sits on your hips—your shoulders aren’t pack mules.
Adjust shoulder straps to contour comfortably, then clip the sternum strap just below your collarbones—breathe easy, now!
Give it a whirl: walk, twist, bend like you’re dodging tree branches or impressing squirrels. Check for rubs or shifts. Use a mirror or buddy to spot what you can’t. Tweak till it feels like it’s made for you—because nobody wants a rebellion from their backpack mid-hike.
Frequently Asked Questions
How Do I Clean My Backpacking Pack?
You clean your backpacking pack by emptying all pockets and shaking out dirt first.
Scrub spots with a soft brush, then soak it in warm water with OxiClean or Nikwax.
Scrub straps and grimy areas gently—those shoulder pads trap sweat!
Rinse it super well to ditch all soap, and towel-dry pockets.
Air dry it completely—no machines!
Pro tip: your pack will smell fresher than a mountain breeze!
Can I Carry a Hydration Bladder in Any Pack?
You can totally carry a hydration bladder in almost any pack—even if it’s not designed for one.
Just slip it in flat, top-side up, and thread the tube through a zipper or vent.
No fancy sleeve? No problem!
Tuck it behind gear to keep it stable.
Yeah, it might wiggle a bit, but hey, you’ll still stay hydrated like a pro.
MacGyver would be proud!
What Should I Do if My Pack Causes Shoulder Pain?
You’re hiking, and boom—your shoulders scream like they’ve been drafted into overtime.
Stop, lighten your load: ditch what you don’t need.
Check your pack fit—snug straps, hips doing their job, not your poor shoulders.
Adjust, don’t just suffer.
Stretch quick, stand tall.
Think of your spine as a proud giraffe, not a sad banana.
It’s not just pain relief—it’s backpack justice.
Are Women-Specific Packs Worth the Investment?
Yeah, women-specific packs are totally worth it if you’re petite or have narrower shoulders and wider hips—they’re designed just for that!
You’ll get comfy, curved straps and a hipbelt that actually fits, so you’re not waddling like a penguin.
Sure, they cost a bit more, but less pain means more fun on the trail.
Just try one loaded—you might never go back!
How Tight Should the Compression Straps Be?
Your compression straps should feel like a firm handshake—snug but not crushing, letting two fingers slide under like they’re sneaking into a concert.
You want the load hugging your back, not bobbing like a nodding dog.
Too tight and you’ll cut off circulation, leaving angry red marks—no one wants vampire shoulders.
Tighten ‘em after loading, work bottom to top, and keep things balanced so your pack behaves like a buddy, not a burden.
Conclusion
So, you’ve adjusted your hip belt, tightened those load lifters, and balanced your gear—doesn’t your pack feel like it’s hugging you back? You’re not just carrying weight anymore, you’re gliding through the trail with everything right where it should be. Comfy straps, snug fit, perfect balance—what could go wrong? Zip your water bladder, chuckle at the squirrels, and hit the path like the trail-crushing pro you now are. Adventure’s waiting, buddy!
References
- https://www.outdoorsgeek.com/backpack-torso-size/
- https://www.ula-equipment.com/2025/01/15/how-to-measure-for-the-perfect-torso-and-hip-belt-fit-on-your-backpack/
- https://www.rei.com/learn/expert-advice/backpacks-adjusting-fit.html
- https://www.youtube.com/watch?v=e_uai12Gjx0
- https://hyperlitemountaingear.com/pages/hiking-backpack-size-chart
- https://www.youtube.com/watch?v=3PJRZkjvTPY
- https://www.bigagnes.com/blogs/support/backpack-fit-guide
- https://atompacks.co.uk/blogs/how-to/how-to-find-your-size
- https://www.youtube.com/watch?v=xsVJwVKfg-k
- https://seekoutside.com/blog/3-tips-for-perfect-backpack-fit-and-adjustment/